Before You Resize Product Photos: Check Resolution, File Size, and White Space
Compare two real exports to see how resizing, file size, and white padding affect product photos before you publish a listing.
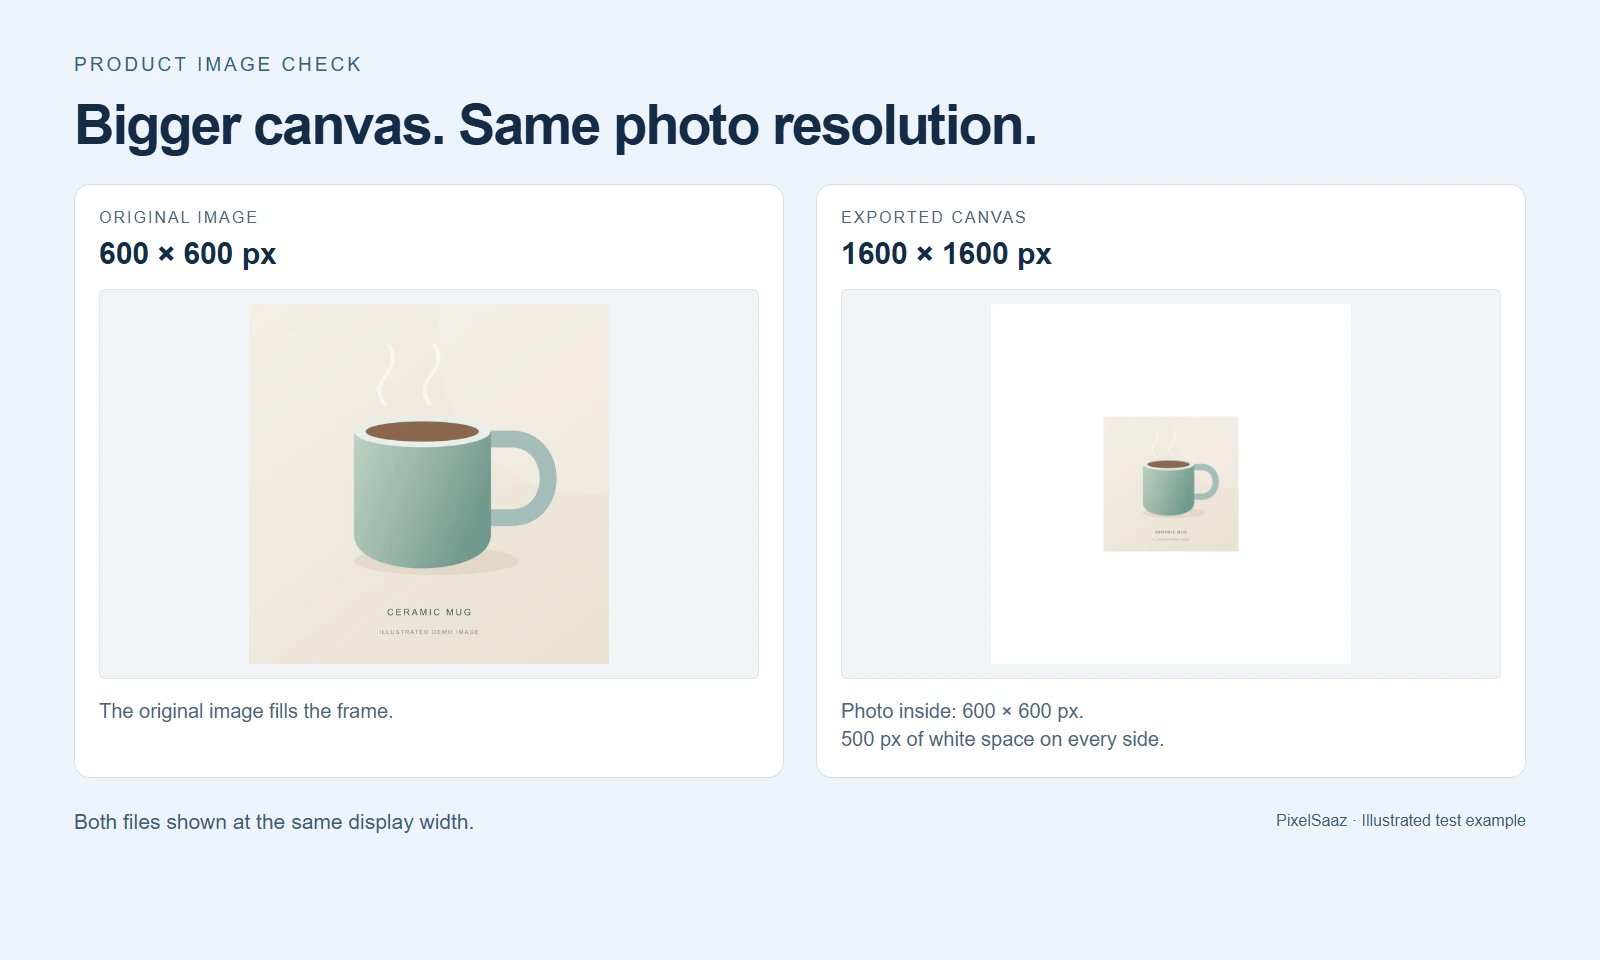
A product image can have the dimensions you wanted and still look wrong in a listing.
The file might be square, but the product sits in the middle of a large white border. Or the batch might be smaller overall, while one individual image has become larger.
These are different problems. Looking only at the export dimensions or the total savings can hide them.
Disclosure: I am building PixelSaaz. A recent user suggestion about reviewing images before downloading led me to improve its download summary. While testing that workflow, I used two versions of an illustrated mug image to examine what the results actually mean.
The examples below were exported from the live website on November 9, 2026. They are demo illustrations, not customer photographs or a benchmark for every product photo.
First, separate dimensions from file size
When someone says an image is “too big,” ask what they mean.
Pixel dimensions describe its width and height, such as 1800 × 1350 pixels. File size describes how much storage or download data it uses, such as 60.71 KB.
You can reduce file size by changing the format or compression settings. You can also reduce dimensions. Those changes can happen together, but they are not interchangeable.
A smaller file does not automatically mean an image has fewer pixels. A file with more pixels does not automatically contain more useful detail about the product.
There is another measurement to watch when an export uses padding: the size of the photo inside the canvas. The canvas dimensions describe the whole exported rectangle, including its borders.
Adobe's image size documentation distinguishes dimensions, file size, print resolution, and resampling. For this browser-based example, the important measurements are the pixel dimensions and the actual bytes in the exported file. Adobe Photoshop image size guide
Test one: make smaller files without forcing a square
I started with two JPEG files:
- large-product.jpg: an 1800 × 1350 illustration, 60.71 KB.
- small-product.jpg: a cropped, downsampled 600 × 600 version of the same illustration, 19.06 KB.
For the first export, I chose No platform preset, WebP, 75% quality, and Maximum width: 1200 pixels in PixelSaaz.
The larger image became 1200 × 900 pixels, with a file size of 8.29 KB. Its aspect ratio stayed the same.
The small image stayed 600 × 600 pixels, with a file size of 4.85 KB. The maximum-width setting did not enlarge it to 1200 pixels.
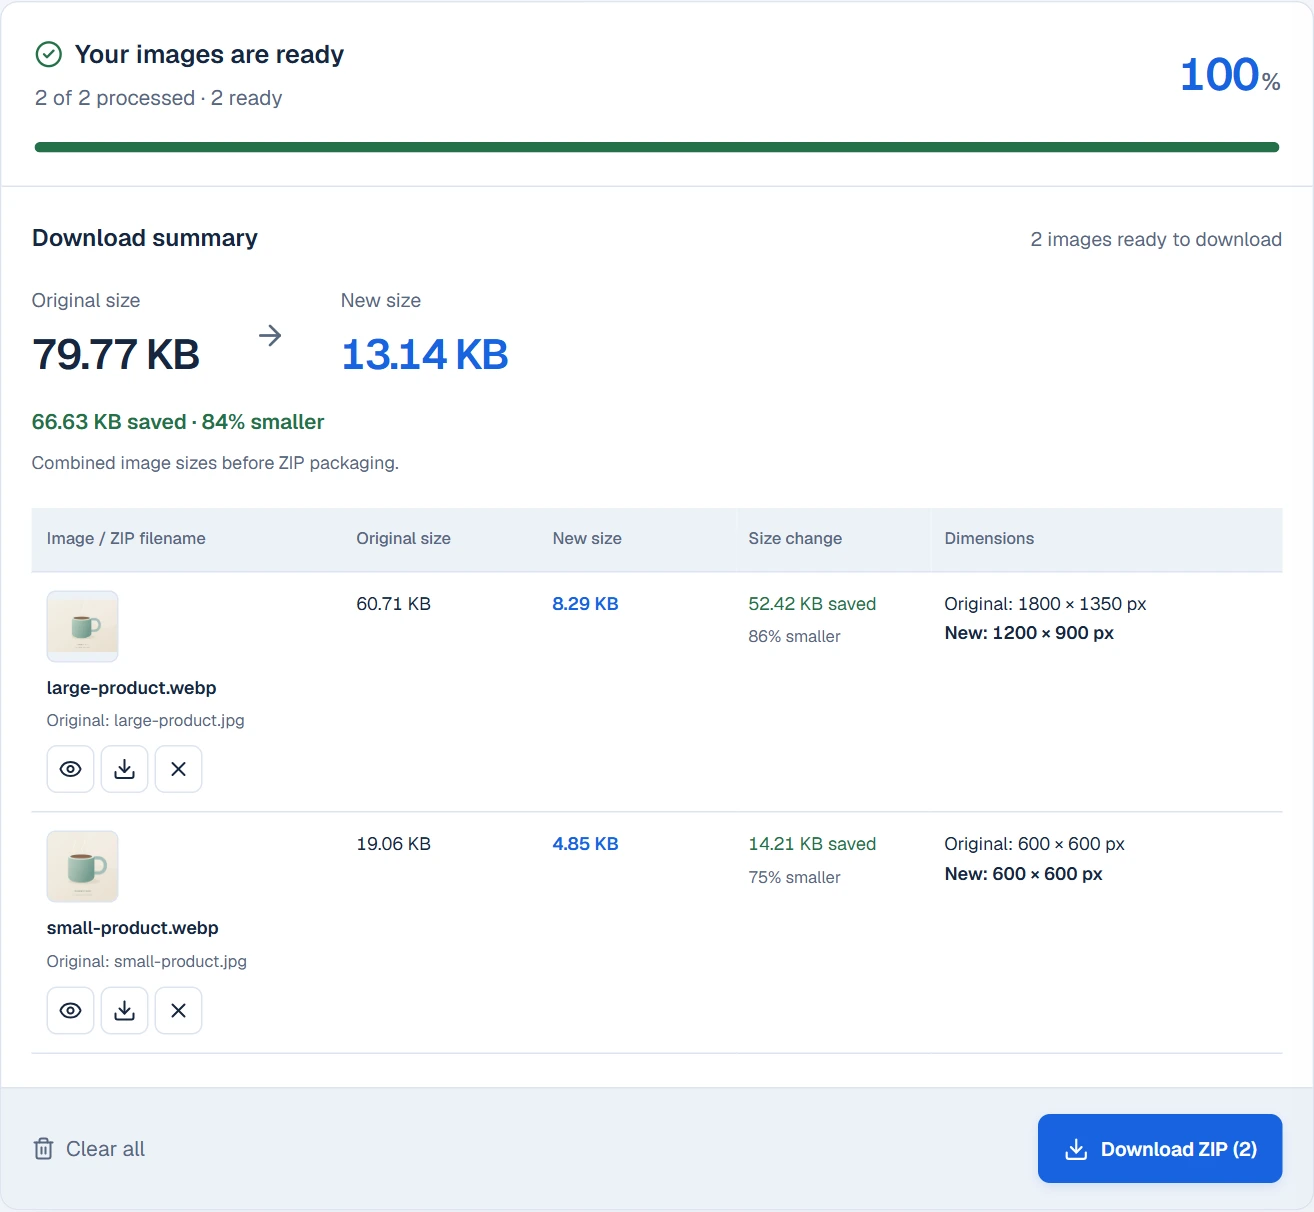
The combined image size fell from 79.77 KB to 13.14 KB, about 84% smaller. That reduction came from these particular illustrations and settings. For the larger image, both resizing and format conversion contributed. It is not evidence that every photograph will shrink by 84%, or that lossy conversion preserves every detail.
Before using an output, I would still check lettering, edges, textures, and any small product features that matter to a buyer.
Test two: make the canvas square
Next, I selected the tool's eBay product preset, which uses a 1600 × 1600 pixel canvas, and re-compressed the same originals. The output format switched to JPEG; quality stayed at 75%.
This is an example of the application's export preset, not a claim that a square image alone meets every marketplace requirement.
The preset fits the full image inside a white canvas. It does not crop, stretch, or enlarge a small original.
For the 1800 × 1350 image, the photo became 1600 × 1200 pixels inside the 1600 × 1600 canvas. The remaining height was filled with white space: 200 pixels above and below.
For the 600 × 600 image, the photo stayed 600 × 600 pixels. To reach 1600 × 1600, the export added 500 pixels of white space on each side.
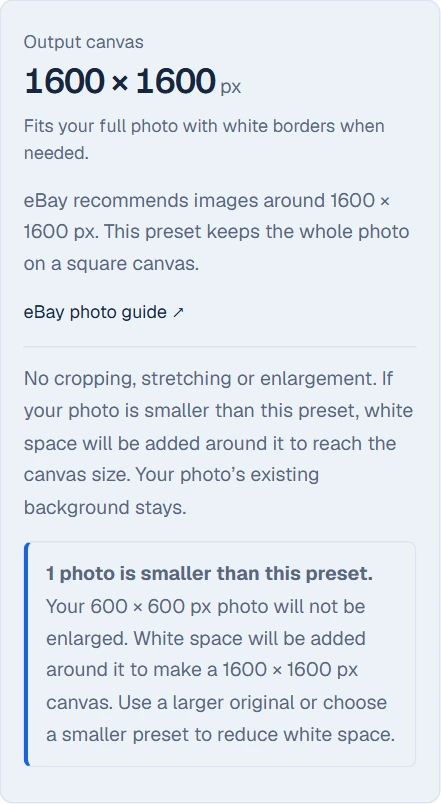
The resulting file really is 1600 × 1600 pixels. But the photo inside it has not gained any resolution. The extra pixels belong to the surrounding canvas.
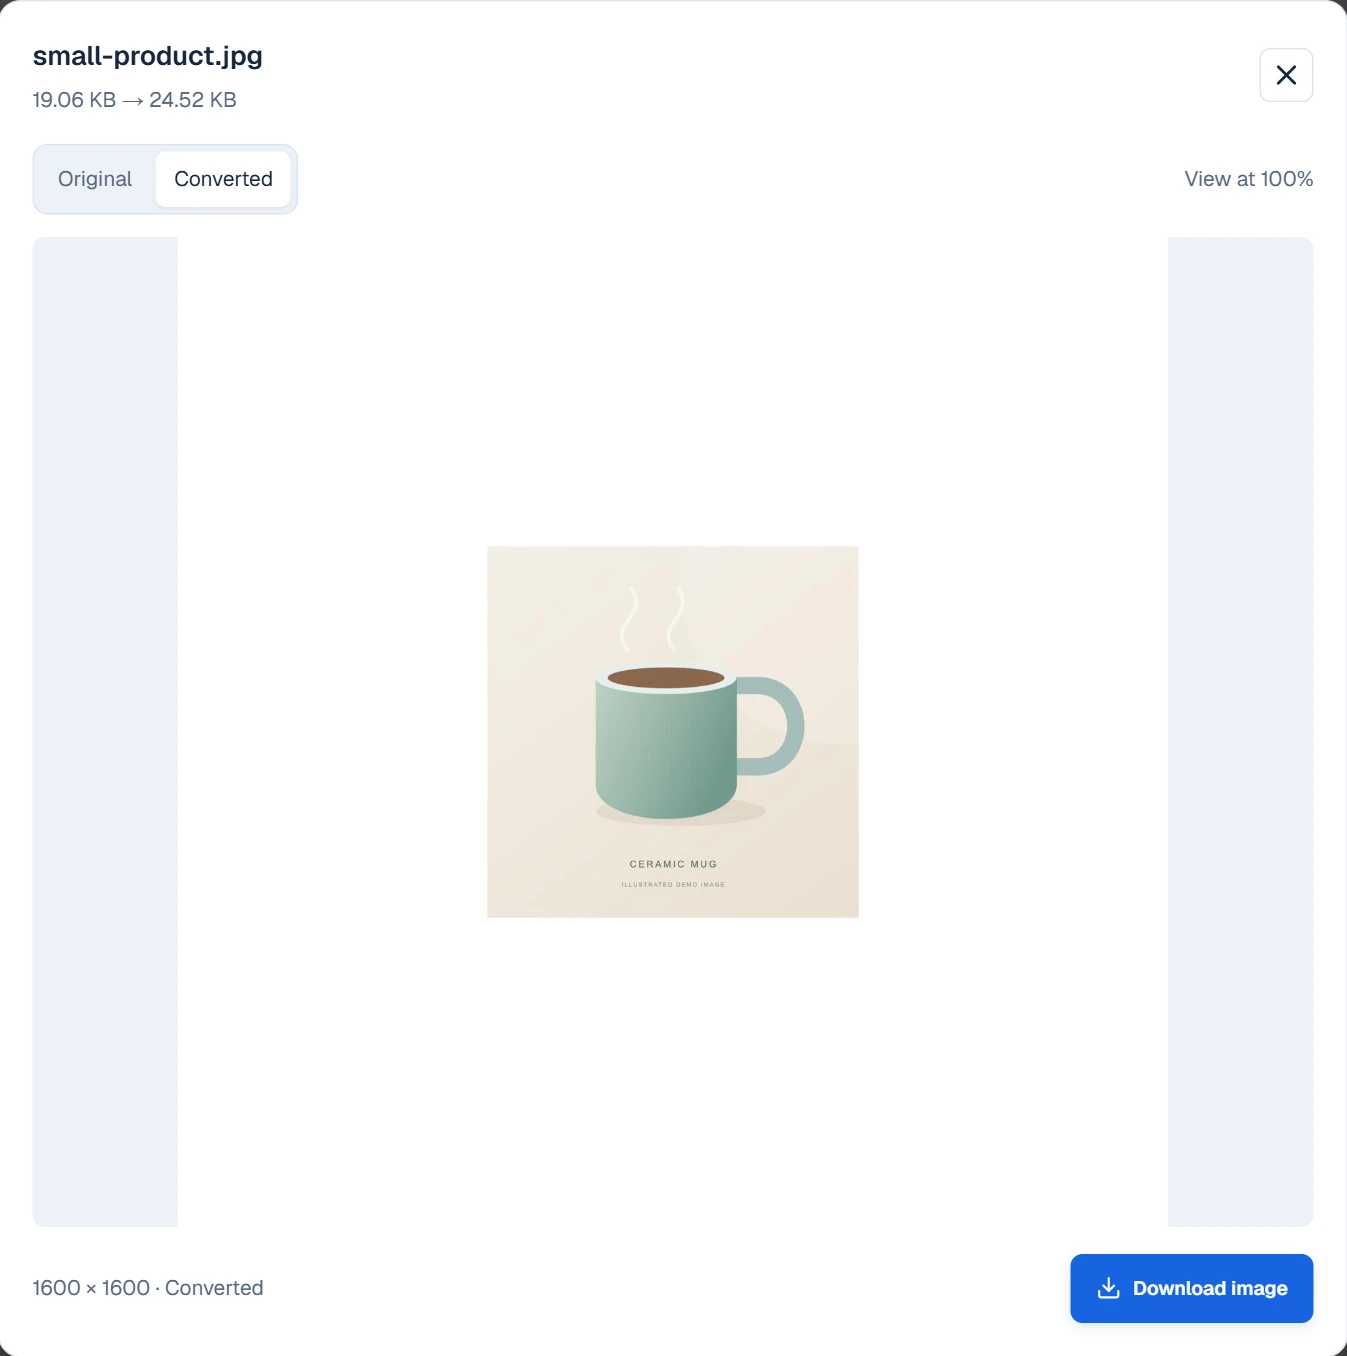
White borders are not always a mistake. They can preserve the full image when its proportions differ from the destination canvas. But a large border may make the product appear smaller than intended, especially in a thumbnail.
If that composition does not work, use a larger original or a more suitable preset. Padding cannot recover detail missing from the source image.
A smaller batch can contain a larger file
The second export revealed why checking individual files matters.
The larger JPEG went from 60.71 KB to 29.8 KB. The smaller JPEG went from 19.06 KB to 24.52 KB, an increase of about 29%.
The batch total still fell from 79.77 KB to 54.31 KB, about 32% smaller.
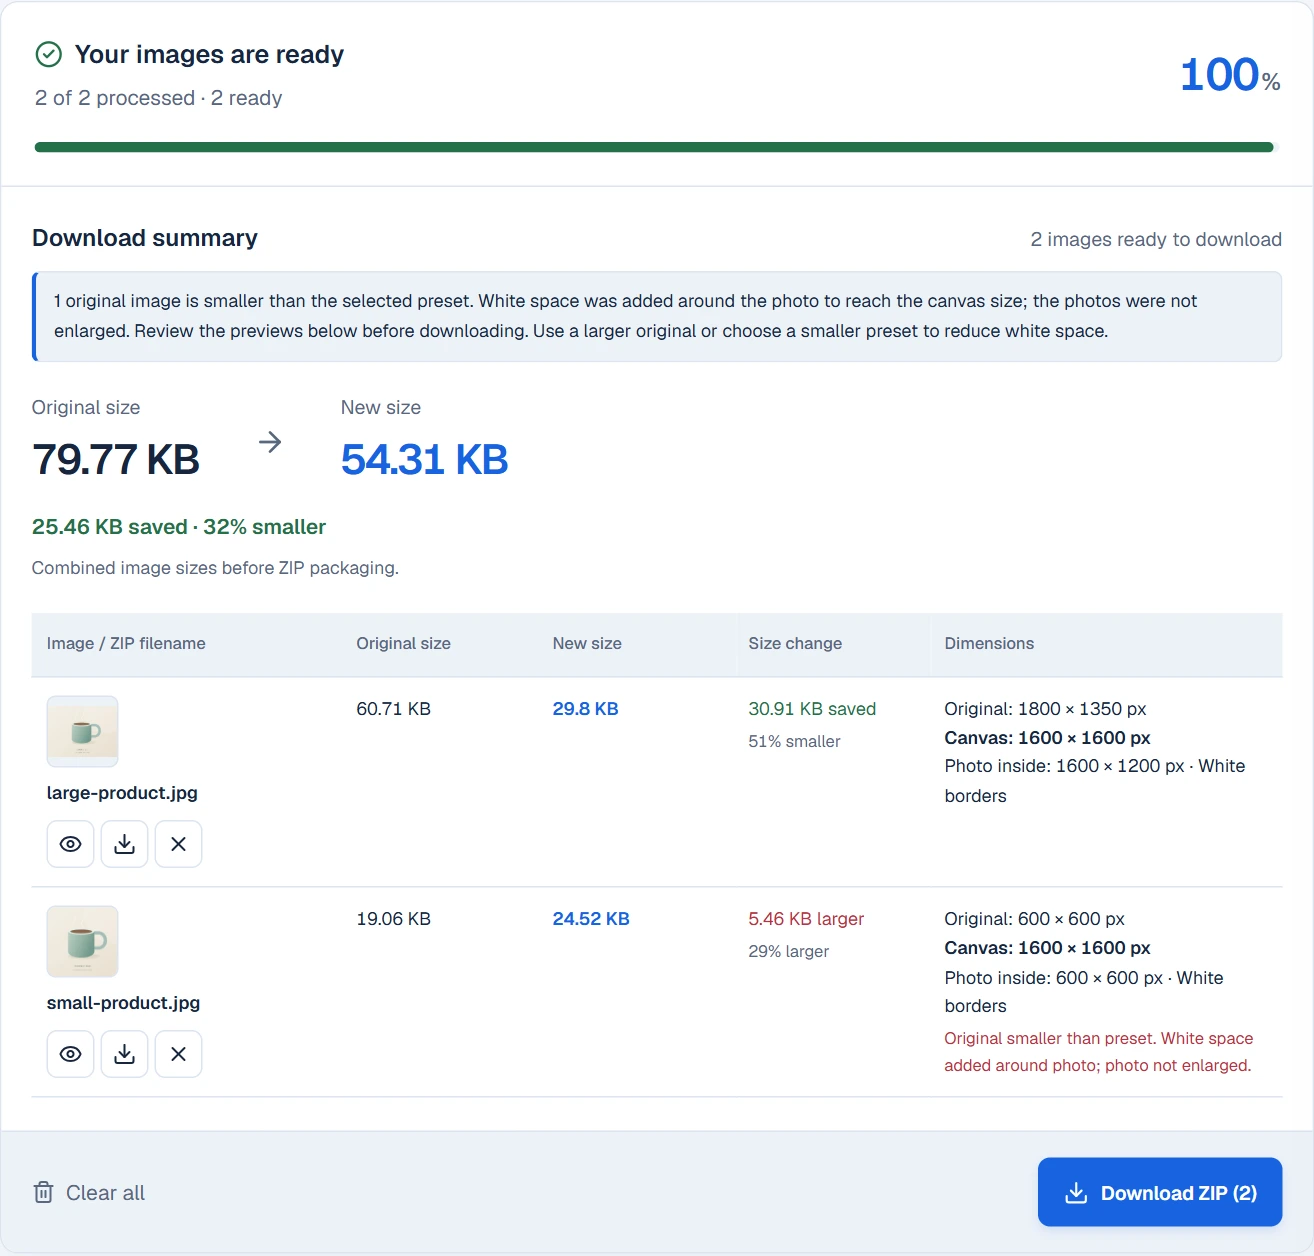
If I had checked only the total, I would have missed that increase. I downloaded the ZIP and checked the exported files' dimensions and byte sizes as well.
This does not mean padding always makes a file larger. Encoding settings, image content, dimensions, and the original compression all affect the result. It means the actual output deserves a check.
What I check before downloading
For a batch, I now review each image against its intended destination:
- Dimensions: Is the exported width and height appropriate? If there is padding, how large is the actual photo inside the canvas?
- File size: Did this individual file get smaller, stay similar, or grow?
- Composition: Does the product appear at a useful size, or does white space dominate the frame?
- Detail: Are important edges, text, and textures still readable in the preview?
- Destination: Does the result fit the platform's current requirements and the way it displays images?
For images on your own website, also check how they look at their actual display size. Google's image guidance recommends balancing image quality with loading performance and using responsive image techniques. Google image SEO guide
The useful outcome is an image that looks right where it will be used, at a sensible file size. A large pixel count or an impressive batch-saving percentage cannot tell you that on its own.
Repeat the test with a small batch. Keep your originals, check the per-image results, and open the previews before downloading the ZIP.